Seven Stainless Steel Protection Film Failures on the Shop Floor: What Actually Went Wrong and How We Fix Them
Stainless steel is the most expensive surface most fabricators handle in a day, and the film on it is the cheapest thing they buy. That mismatch is where the trouble starts: a 3-cent-per-square-meter consumable gets blamed for a $3,000 panel, or a $30 roll gets asked to survive a laser, a press brake and four months under a tarp.
We wrote this after enough of the same seven complaints came back from sheet-metal shops, elevator-panel suppliers and kitchen-equipment plants that the pattern stopped being coincidence. None of them is a mystery. Each has a cause that can be located — usually in the intersection between what the film was specified to do and what the shop actually did to it — and each can be prevented with something you can check in about a minute.
This is the shop-floor counterpart to our general stainless steel protective film guide, which covers what to buy and how finishes differ. Here we assume the film is already on the metal and something has gone wrong. If the complaint is a sticky residue left on a plain metal surface rather than a finish-specific failure, the mechanism-by-mechanism breakdown in why protective film leaves residue on metal is the better place to start — we do not repeat it here.
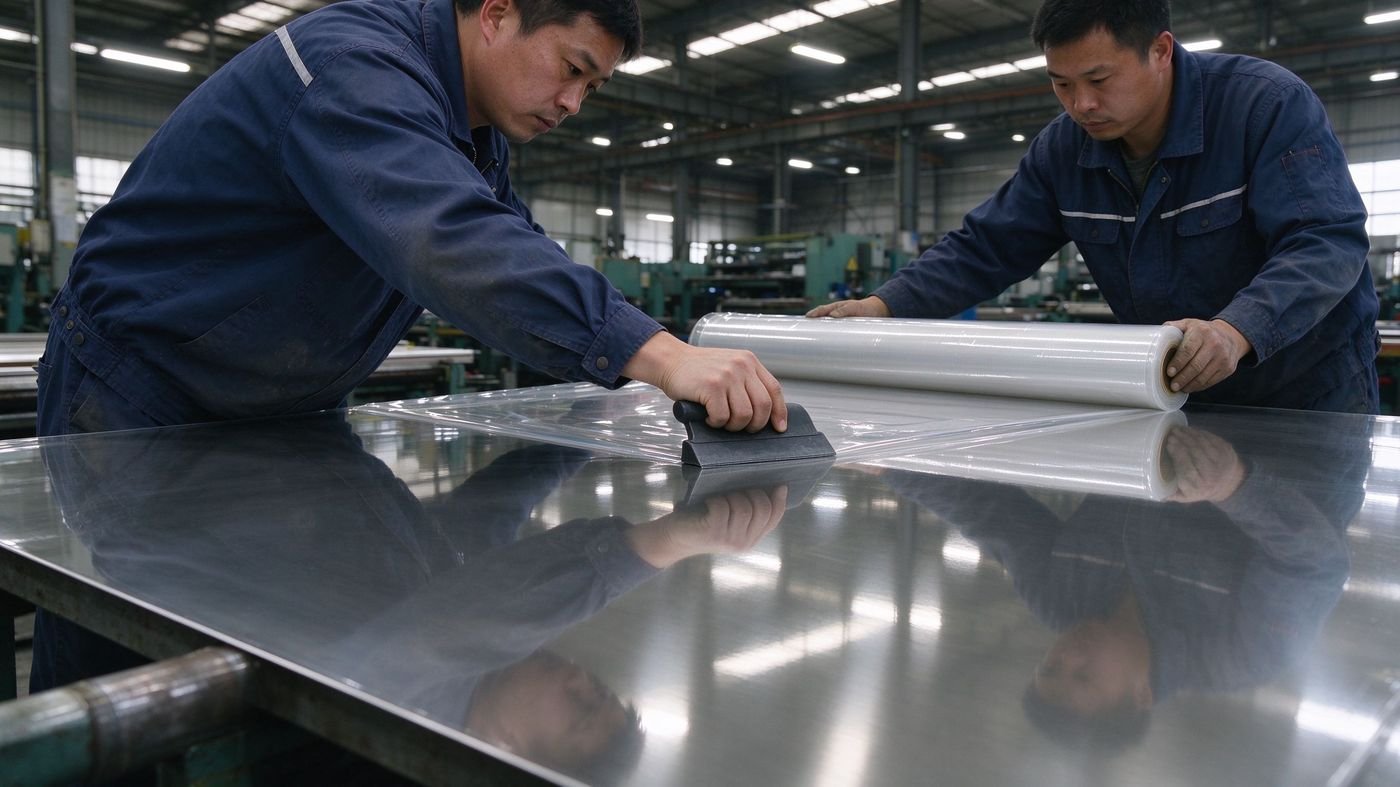
Failure 1: The film comes off and the rectangle stays
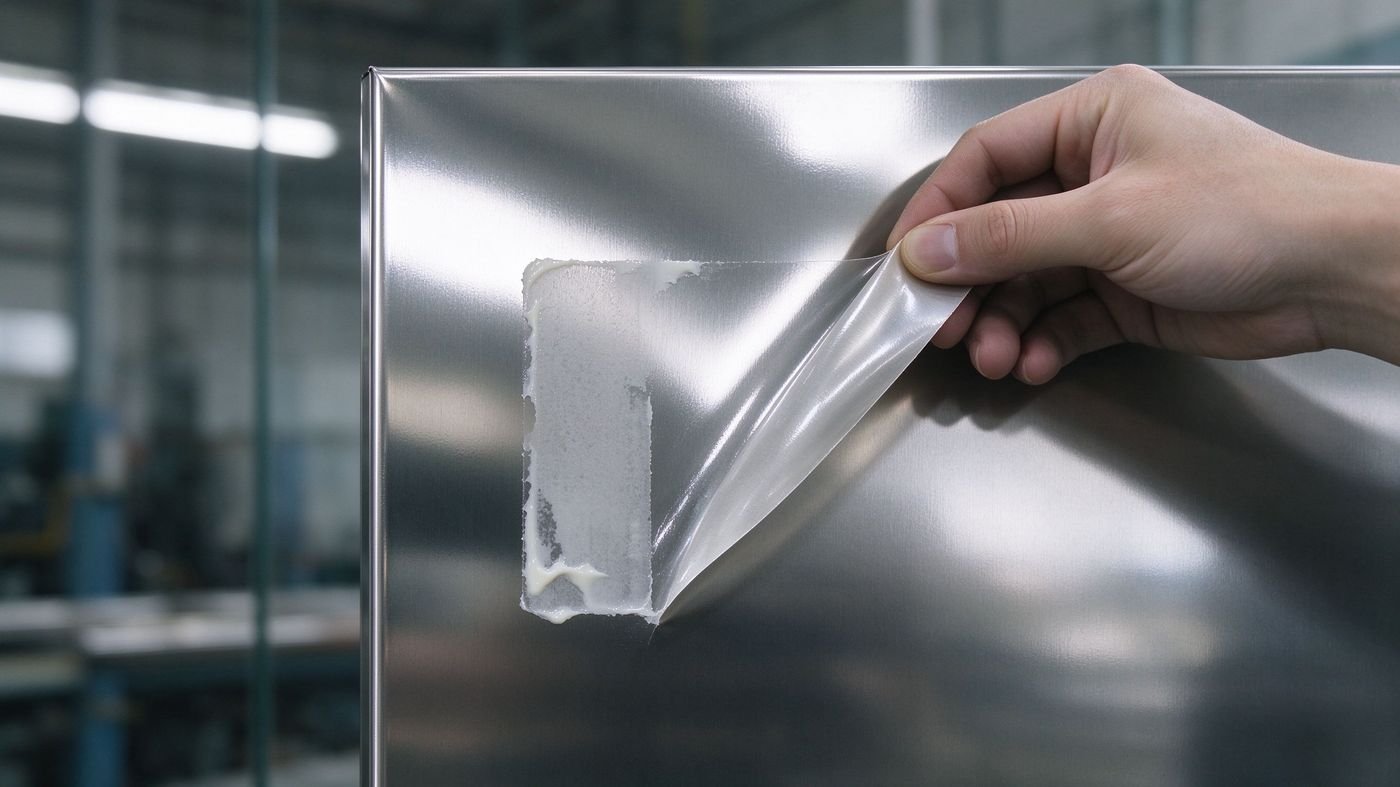
What it looks like. A mirror or bright-annealed panel is peeled clean, wiped, and inspected under normal factory light — nothing visible. Then it goes onto a wall, into a lift car, or under a display spot at an angle, and a faint rectangular outline appears exactly where the film was. Not dirt. Not a scratch. A duller, slightly hazy frame with a sharp edge, sometimes with a whiter line where the adhesive sat densest.
What is usually happening. Three things produce this same footprint. First, dwell: the adhesive has been in intimate contact with a very smooth, non-porous surface far longer than it was designed for, and what remains after peeling is a molecularly thin layer that water and normal wiping will not lift. Second, heat: a panel that sat in sun, near a drying oven, or in a warm warehouse cures the adhesive against the metal. Third, plasticizer or tackifier migration from a cheap film carrier into the adhesive, which turns a “removable” film into a semi-permanent one over weeks. Because mirror finish reflects at grazing angles, a ghost that is invisible on 2B or No.4 is glaringly obvious on No.8.
Who owns it. Mostly the film, partly the schedule. A film with an under-specified adhesive and no realistic removal window will ghost on any mirror panel given enough time; a correct film left on for three months will ghost too. The shop controls dwell, and dwell is the variable that most often gets forgotten because the panel looks finished.
What we do about it. We treat removal window as a specification, not a footnote. When a customer tells us the panel will be filmed at the mill and only unwrapped after installation — a lift car, a column cladding, a cold-room wall — we quote the film by that calendar length rather than by thickness or price, and we say plainly when the honest answer is “no film will survive that, plan to re-wrap or use a strippable coating.” For panels that must travel and then sit, we recommend unwrapping and re-filming at the intermediate stage instead of stretching one film across the whole chain.
How to confirm in 60 seconds. Take a scrap offcut of the same finish, film it with the same roll, and put it in the sun or a warm spot for a week. Peel it and look at it under a torch held at roughly 15 degrees to the surface — grazing light is how your customer will see it, and how your own QC probably will not.
Failure 2: The film welds itself to the sheet at the laser cut
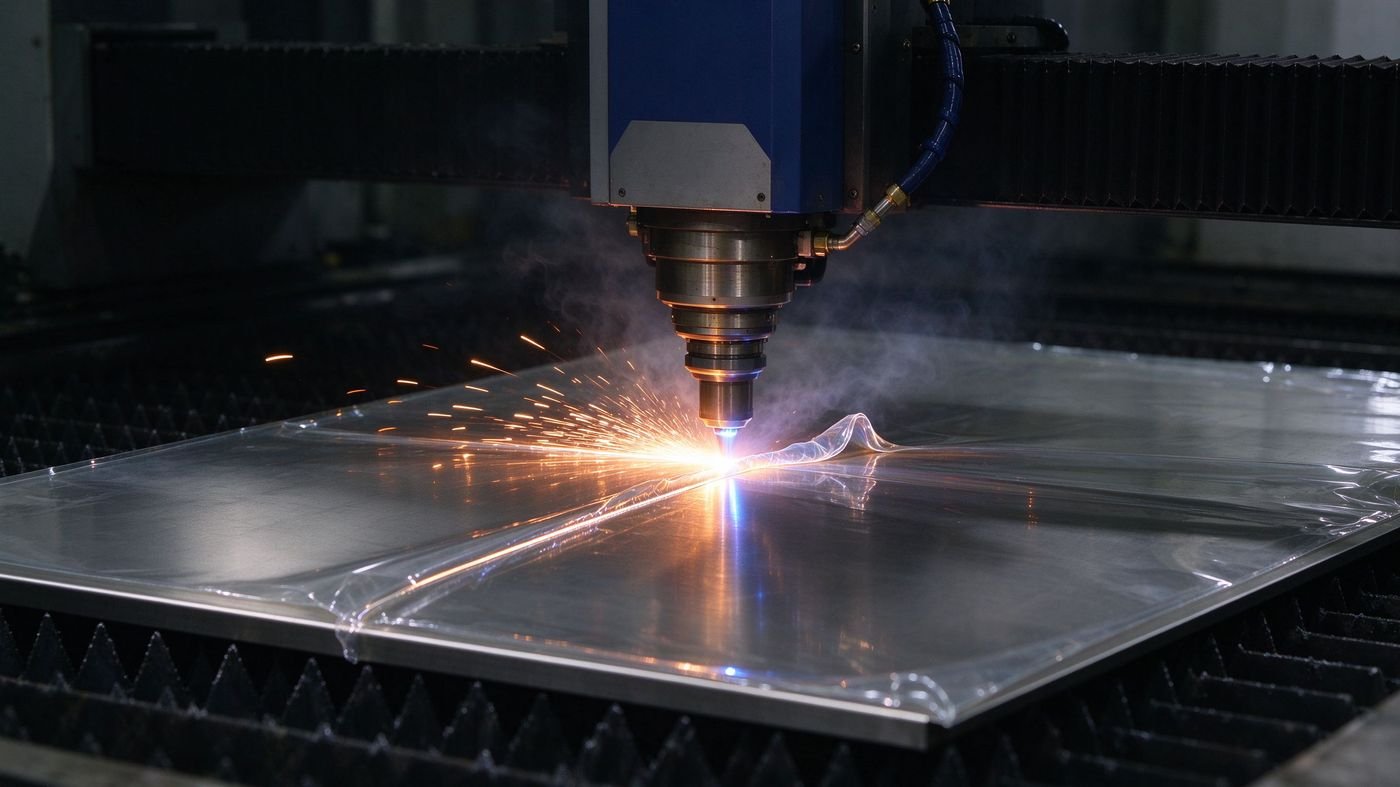
What it looks like. Parts come off the fiber laser with a hard, brown-black crust along the cut edge, and the film in a 5–15 mm band around the kerf has gone from transparent to a cooked amber. Peeling it takes a blade and leaves a line of gummy residue right where the part is most visible. Sometimes the film tears along the cut and lifts, and dross sticks to the film instead of dropping through the slats.
What is usually happening. The laser is doing exactly what it is supposed to do to metal, and the film is absorbing heat it was never rated for. Two specifics matter. If the film is PVC-based, the cut zone releases hydrogen chloride, which is aggressive toward stainless — particularly at the weld or cut edge where the passive layer has just been destroyed — and that is a corrosion risk that does not show up until the part is in service. If the adhesive is a high-tack rubber or solvent acrylic, the heat cures it and the residue becomes genuinely difficult to remove without abrasives. Cutting with film on also changes the cut itself: the film can hold dross, disturb assist-gas flow at the kerf, and produce a slightly rougher edge than the same parameters on bare metal.
Who owns it. The process decision owns most of it. Cutting filmed stainless is a legitimate production choice — it protects the face during handling — but only if the film was chosen for it. A shop that buys whichever roll is cheapest and then runs it through a 6 kW laser has combined a heat problem with a chemistry problem.
What we do about it. For any sheet that will be laser cut or welded with film in place, we specify PVC-free film and say so in writing, and we recommend either a lower-tack grade that releases at elevated temperature or stripping a margin around the cut path for cosmetic parts. When a customer’s parts are for food equipment or exterior architecture, we push harder on the PVC point, because the failure shows up months later as a rust stain nobody can trace.
How to confirm in 60 seconds. Cut one small test part with film on. Let it cool, peel, and wipe the edge with a white cloth and a mild solvent. If the cloth picks up colour or the edge feels tacky, the film was not built for that machine.
Failure 3: The coil edge curls and tunnels before it ever reaches the line
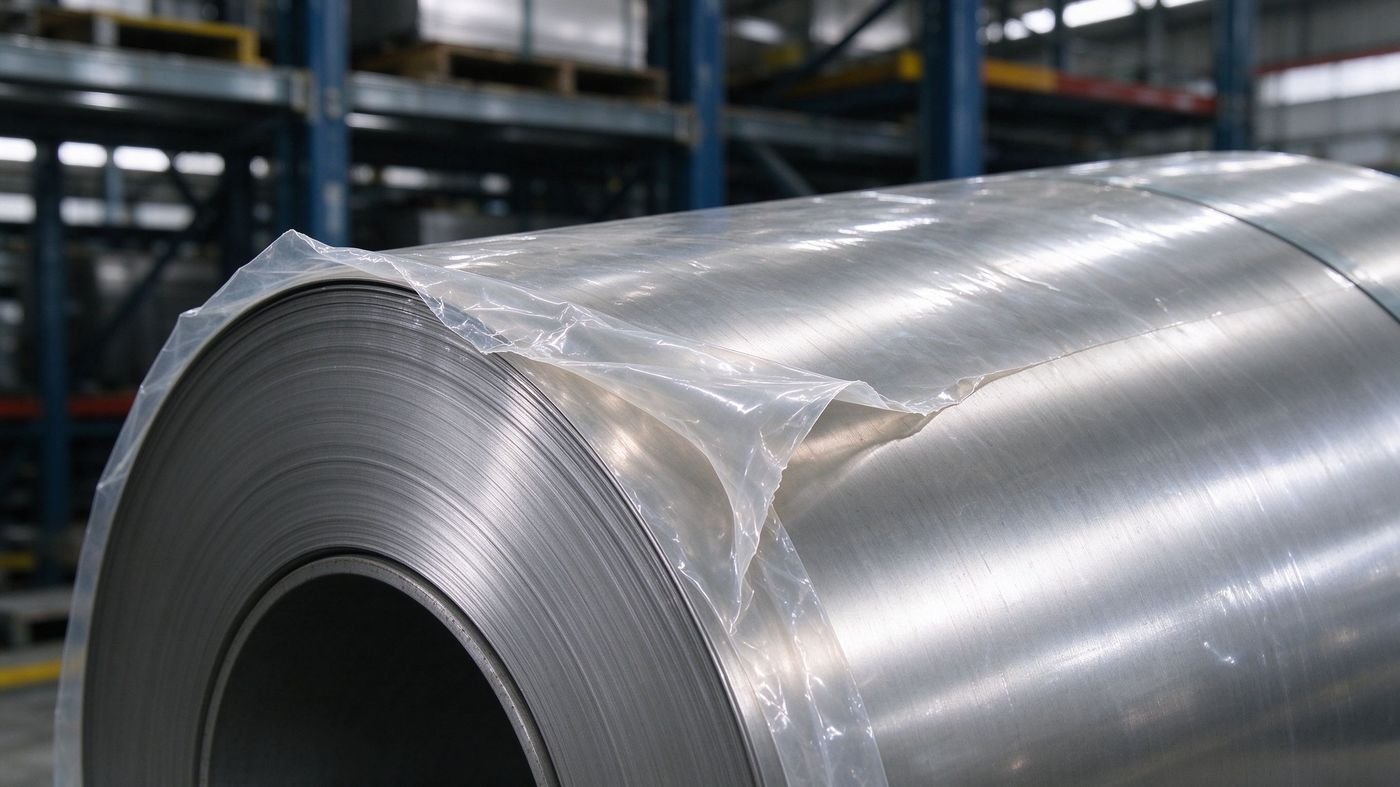
What it looks like. On a slit coil or a stack of cut sheets, the film lifts at the outer edge, curls back on itself, and in places runs away from the metal in a raised tunnel several centimetres long. Under the tunnel there is often a damp line or a dull band. Operators find it when they unload, and then spend the run chasing a loose edge that catches on guides.
What is usually happening. The film was applied under tension that suited a flat sheet, then the material was wound, slit or stacked. Winding compresses the outer layer and stretches the film; when the coil relaxes, the edge is the only place with nothing to hold it down. Cold weather stiffens the carrier so it cannot follow the slight crown of the coil, and the tunnel becomes a channel: coolant, condensation or humid air travels along it, and the metal under the tunnel ends up in a different condition from the metal beside it. A stack of sheets behaves similarly at the corners, where the film crosses an air gap.
Who owns it. The coil processor and the film spec share it. Tension, edge overlap and storage conditions are process; whether the film can follow a coil edge at low temperature is product.
What we do about it. For coiled material we recommend an edge overlap and a slightly higher-tack edge band rather than upping tack across the whole width, and we ask about winter handling temperature before quoting a carrier, because a film that behaves in Guangdong in June is a different film in a cold northern warehouse in January. We also advise not storing coils on end where the edge is exposed to draughts.
How to confirm in 60 seconds. Look along the coil edge at a low angle instead of face-on. A tunnel that is invisible straight-on is obvious at a glance once you are looking along the edge line; then feel the edge for a film lip that has already lifted.
Failure 4: Air bubbles read as dents, and good panels get rejected
What it looks like. A mirror panel arrives at inspection with a scatter of soft circular marks that look exactly like a dented surface. The panel is rejected, scrapped or downgraded. Peel the film off and the surface is flawless.
What is usually happening. This is a false defect, and it is expensive because it is invisible in the other direction: the film is doing its job and the inspection method is misreading it. On a mirror surface, a trapped air pocket under a transparent film acts as a small lens, and its shadow reads as a depression. The problem is worse when the film was applied cold, applied dry at speed, or applied over a surface that was not flat enough for the squeegee to chase air out to an edge. Roughness matters too: a No.4 brushed finish gives air somewhere to escape laterally, while a No.8 mirror gives it nowhere to go.
Who owns it. The applicator and the inspection procedure. This is one of the few failures where the correct fix is a rule rather than a product: no panel is rejected for a surface defect while the film is still on it, unless the mark survives a peel on a sample area.
What we do about it. We supply mirror-grade film with a smoother, more conformable carrier where customers report bubble-driven rejections, and we tell them the cheaper intervention first: apply from the centre out with overlapping squeegee strokes, and keep a “peel window” on every inspection bench so a suspected dent can be resolved in ten seconds instead of a scrap note.
How to confirm in 60 seconds. Peel a 100 mm square at the suspect mark. If the mark disappears, you have found a bubble, not a dent — and you have also found a QC procedure that is costing you panels.
Failure 5: The film shifts through the press brake and streaks the bend line
What it looks like. After bending, the film has slid a few millimetres relative to the sheet, and along the bend line there is a smeared, stretched band where the film sheared. On tight radii the film sometimes splits, leaving a ragged edge that has to be picked off by hand.
What is usually happening. Two causes, often together. The surface was oiled, waxed or left with drawing lubricant, and the adhesive is sitting on the oil rather than on the metal, so it has almost no shear resistance. Or the film’s tack is genuinely too low for a forming operation, chosen because low tack is assumed to be “safer” for stainless. Low tack is safer for removal; it is not automatically safer for processing. Elongation matters as well — a stiff carrier cannot follow a bend and will either shear at the line or lift at the shoulder.
Who owns it. Both. The shop controls cleanliness before filming; the supplier controls tack and elongation. The split is easiest to see in the evidence: if the film slid as a whole, suspect the surface; if the film stayed put and tore, suspect the carrier.
What we do about it. We ask what happens to the part after filming — transit only, or forming — because those two answers should not get the same film. For parts that will be bent, we recommend degreasing before application and a grade with enough shear strength to hold through the stroke, and for cosmetic bend lines we suggest filming after forming rather than trying to protect a line that is about to be stretched.
How to confirm in 60 seconds. Take a filmed offcut, wipe half of it with solvent and leave half oily, then bend both. Whichever one slides tells you which half of your problem you own.
Failure 6: A matte patch appears after someone wipes the film
What it looks like. A dull, slightly whitened patch on the film — not on the metal — with the shape of a wiping stroke. Sometimes the film goes soft and tacky there, and sometimes it crazes and cracks along the same path.
What is usually happening. A solvent was used on the film to remove a mark, a sticker or a handprint. Acetone, MEK, toluene and high-strength IPA attack many film carriers and print layers. The film is not a cleaning surface; it is a temporary membrane. The patch is the film telling you it has been chemically changed in that area, which also means its adhesion and elongation there are no longer what you specified.
Who owns it. The shop. This one is almost always a procedure failure, not a product failure — and it is the easiest of the seven to eliminate.
What we do about it. We tell customers to wipe the metal, not the film: remove the film from the area first, clean, then re-film if protection is still needed. Where a wipe-down is unavoidable on a filmed part, we ask which cleaner is in use and confirm compatibility before the order ships, rather than after the panels are on a wall.
How to confirm in 60 seconds. Spray the cleaner on a filmed offcut, wait two minutes, wipe, and look at the film under a light. If it hazes, that cleaner is not allowed anywhere near the finished panels.
Failure 7: Film that survived the shop dies in the yard
What it looks like. Panels stored outdoors or in an unheated bay for weeks come back with film that has gone brittle, cracked at the corners, and in places delaminated entirely. Where it still peels, it peels in brittle flakes and leaves adhesive behind; between film and metal there is condensation, and occasionally a stain pattern that follows the film edges.
What is usually happening. UV plus moisture plus thermal cycling, on a film that was specified for indoor transit. The carrier embrittles, the adhesive cross-links, and the film stops being removable in the sense the word meant when it was bought. The condensation part is the more serious one: a film edge that has lifted gives humid air a place to sit against stainless, and stainless is corrosion-resistant, not corrosion-proof — chlorides from a coastal yard are exactly the condition it handles least well.
Who owns it. Storage decisions own it. Almost every case we see is a film doing an indoor job in an outdoor place, and the purchase order never mentioned the yard.
What we do about it. We ask where the material will sit between dispatch and installation, and if the answer is “outside, maybe a month”, we quote a UV-stabilised grade and give an honest exposure limit rather than letting the customer discover it. Where outdoor storage is unavoidable and the limit will be exceeded, we recommend a cover and a re-wrap schedule instead of one film for the whole period.
How to confirm in 60 seconds. Put a filmed offcut on the roof or by a south-facing window for a week, then try to peel it in one piece. If it breaks into flakes, that film does not belong in your yard.
Who owns the problem: a responsibility map
Most arguments between a fabricator and a film supplier are actually arguments about which column a complaint belongs in. This table is the version we use in claims conversations, because it lets both sides stop defending and start locating.
| Complaint | Usually film spec | Usually process | Decide by |
|---|---|---|---|
| Ghost outline on mirror | Adhesive type, removal window, plasticiser migration | Dwell time, heat exposure, storage | Offcut aged in the same conditions — does a fresh roll ghost too? |
| Residue at laser cut edge | PVC content, heat-resistant adhesive | Cutting with film in place, assist gas, dross handling | Same film on an uncut area — does it peel clean? |
| Edge curl / tunnelling on coil | Carrier stiffness at low temperature, edge tack | Winding tension, edge overlap, draughts | Inspect a coil stored in controlled conditions |
| Bubbles mistaken for dents | Conformability, surface smoothness | Application technique, inspection rule | Peel the suspect area — mark disappears? |
| Film shifts at the bend | Tack, elongation, shear strength | Oil or lubricant left under film | Bend an oily and a clean offcut side by side |
| Matte patch after wipe | Solvent resistance of carrier | Which cleaner, applied to film or metal | Spot test the cleaner on a filmed offcut |
| Brittle film after yard storage | UV stabilisation, exposure limit | Outdoor storage duration, cover | One week on a roof tells you most of it |
The four-check incoming inspection (about 60 seconds per roll)
You cannot run any of the seven tests above on a roll you have just received, because most of them need time. What you can do is catch the rolls that will fail, before they are on the metal. We recommend four checks at goods-in, on an offcut of the exact finish being produced:
- Peel and residue check. Film a 150 mm offcut, wait ten minutes, peel by hand at roughly 180 degrees and look for a gummy line. A clean peel here means the adhesive at least starts compliant.
- Grazing-light ghost check. After peeling, shine a torch across the surface at about 15 degrees. Any visible frame now will be a visible frame later, only worse.
- Solvent spot check. Wipe half the filmed offcut with the cleaner your line actually uses. Compare with the untouched half under the same light.
- Bend check. Bend the offcut through the tightest radius in the job, once oily and once clean. Look for sliding and for shear at the line.
Four offcuts, one shift, and you have a documented baseline for every claim conversation afterwards — which is exactly the method we used to build the complaint audit behind our nine carpet film complaints autopsy.
Match the film to the process, not just to the metal
The single biggest cause of all seven failures is specifying by substrate alone. “Stainless steel film” is not a specification; stainless steel plus a process plus a dwell is. This is the matching we ask customers to fill in before we quote:
| What happens after filming | What the film has to survive | What we specify |
|---|---|---|
| Transit and indoor storage only | Handling, stacking, a few weeks | Standard PE carrier, moderate tack, defined removal window |
| Laser cutting or welding with film on | Localised heat, possible HCl if PVC | PVC-free carrier, heat-tolerant adhesive, margin stripping for cosmetic parts |
| Press braking or roll forming | Shear and elongation at the bend line | Higher shear strength, clean degreased surface, or film after forming |
| Coiling / slitting | Winding tension, cold, edge exposure | Conformable carrier rated for your winter temperature, edge band |
| Outdoor or unheated yard storage | UV, rain, thermal cycling, condensation | UV-stabilised grade with a stated exposure limit |
| Mirror finish, any route | Zero tolerance for ghost or bubble | Smooth carrier, low-ghost adhesive, short window, peel-before-reject rule |
Two of these rows are about chemistry and two are about weather. None of them is about price per square meter, which is why the cheapest roll so often ends up as the most expensive panel.
Where film should never go
A short list we give to every new stainless customer, because each line is a claim we would rather prevent than argue:
- PVC film on parts that will be laser cut, welded or heat-formed. The chlorides attack the freshly exposed edge, and the corrosion appears weeks later, somewhere else.
- Film over an oiled, waxed or lubricated surface. The adhesive is not touching metal, so nothing about the tack you specified applies.
- Film on hot sheet. Anything above roughly hand-warm and you are curing the adhesive before it has done its job.
- One film across a multi-stage process. Mill to installer via laser, bend and a yard is four dwell periods, not one.
- Film as a permanent finish. It is a transit membrane with a removal window. Past that window it becomes a restoration job.
- Re-used film. Once the adhesive has carried dust, it scratches the finish it was bought to protect.
What we changed in our own supply after these seven showed up
None of the seven is a failure we can wave away as “customer misuse” — three of them were ours to fix on the product side, and the other four were ours to fix in how we quote. So the practical changes were:
- Every stainless quotation now asks three questions: final finish, what happens to the part after filming, how long will the film stay on. The answer changes the film, and we say so in the offer instead of shipping the default roll.
- Removal window and outdoor exposure limits are stated in writing, in weeks, with the conditions they assume. Where the customer’s real timeline exceeds them, we say the limit out loud rather than letting the panel find it.
- PVC-free film is the default for any order destined for laser cutting, welding or food-contact equipment, and it is priced as the default rather than as an upgrade.
- Where a finish is mirror, we ship the peel-before-reject rule as a one-page insert with the roll, because it saves more panels than any adhesive improvement we can make.
You can see the resulting grade range on the stainless steel sheets protective film page. For colour-coded shop-floor handling, the grading logic behind blue film is covered separately in our blue masking film standard.
FAQ
Can I laser cut stainless steel with protective film still on?
Yes, and many shops do, but only with film specified for heat: a PVC-free carrier and an adhesive that releases rather than cures at the kerf. Cutting with a cheap PVC film leaves cooked adhesive at the cut edge and puts chlorides against freshly exposed stainless, which is a corrosion risk that surfaces long after the parts ship. For cosmetic parts, stripping a margin around the cut path is the cheaper compromise.
Why does film leave a rectangle on mirror stainless when it leaves nothing on 2B?
Because mirror finish reflects at grazing angles. The same microscopic adhesive layer that is invisible against a dull, anisotropic 2B surface becomes a sharp, visible frame on No.8. Add a long dwell or a warm storage period and the layer becomes more than microscopic. Grazing light is the test, not face-on inspection.
Is low tack always the safer choice for stainless?
No. Low tack reduces the risk of residue and ghosting on short-dwell transit, but it also reduces shear strength, so film with too little tack slides through a press brake or lifts at a coil edge. The right question is not “how low can tack go” but “what does this part have to survive before removal”.
How long can protective film stay on stainless steel?
It depends on adhesive, finish, temperature and exposure, which is why we quote it as a window in weeks rather than a single number, and why we ask for your real timeline. Indoor, moderate temperature, standard finish: weeks, comfortably. Sun, heat, mirror finish or a coastal yard: the window shortens sharply, and past it the job changes from peeling to restoring.
Can I wipe the film with solvent to remove a mark?
Better to remove the film, clean the metal, and re-film that area. Acetone, MEK, toluene and strong IPA attack many carriers and turn the film matte, soft or crazed — and a film that has been chemically changed no longer has the adhesion or elongation you specified. If a wipe on film is unavoidable, spot-test the exact cleaner on an offcut first.
Does film thickness decide whether it survives the shop?
Less than most people expect. Carrier chemistry, adhesive type and the removal window do most of the work; thickness mainly affects handling, puncture resistance and how the film behaves at an edge. A thick film with a curing adhesive still ghosts, and a thin film with the right adhesive can survive a bend. If thickness is the only variable in your purchase decision, five of the seven failures above are still available to you.
If a panel already failed, send us the evidence, not the complaint
The fastest way to resolve any of these seven is a photo of the failure under grazing light, the finish, the process route, how long the film was on, and where it was stored. With those five things we can usually name the cause in one reply and tell you whether the next roll should change or the next procedure should. Tell us the finish, the process and the dwell, and we will match the film to all three rather than to the word “stainless”.
Send us the details and an offcut photo, and we will come back with a spec and, where it applies, the honest limit.
¿Prefiere leerlo en español? Nuestra versión en español de este mismo análisis — los siete fallos, la tabla de responsabilidad y las comprobaciones de sesenta segundos — está en los siete fallos de la película para acero inoxidable en el taller.